Rapid web application development is only “rapid” if you know what you are doing! It took me some time to accomplish this goal with JBoss Seam but I think it was worth it. Seam framework is a bunch of the best technologies in Java world connected together and personally I think it has a big future.
Seam is great framework but like with the others, the problems arise if you want to skip the default and create something on your own, to plug it into existing environment. The framework, when used with defaults, allows you to create the CRUD application so fast that you won’t have a chance, to have a sip of your favourite coffee, on the other hand, if you want to change for example, the database from default Hypersonic bundled together with JBoss application server it can brings you some trouble.
This is a very simple tutorial on how to set up your first Seam project with the MySQL server.
I use Ubuntu 7.04 FF with MySQL and Java 6.0 installed from the standard repos.
Let’s get started, first you have to install MySql database and of course Java on your machine, this is not tutorial on mysql setup, so I won’t go into detail but you have to create the user, new database and some sample tables, add privileges for the users accordingly, create the password and so on.
One more thing before you get started, you have to download appropriate jdbc driver for you database. I’m using mysql-connector-java-5.0.7-bin.jar for MySQL database.
I start my tutorial assuming you have prepared the above.
1. Download and unpack JBoss Seam 1.2.1.GA from:
http://labs.jboss.com/jbossseam/download/index.html
2. Open build.properties and change the path to your JBoss 4.0.5 installation accordingly.
You can easily skip the tomcat path for the purpose of this tutorial
3. When using Linux/Unix add -x flag to seam file in Seam directory by executing:
chmod +x seam
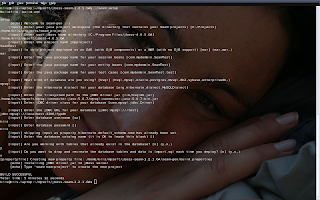
4. Run ./seam setup
The setup application will ask you quite a lot of questions, be patient and make sure you give the correct answers.
Click on the image to enlarge. Seam will remember your very first setup and when at a later time, you would like to change anything, most of the time you will just press Enter to accept your defaults.
5. After the initial setup, run ./seam new-project to generate skeleton application template with build scripts and configuration files.
6. Type ./seam explode and when everything is ok, start the JBoss server.
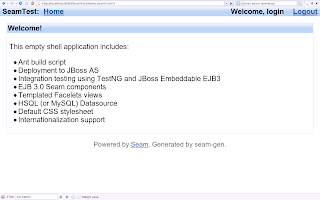
7. When the server is ready and your application (ear) is successfully deployed to $JBOSS-HOME/server/default/deploy directory start the browser and enter the URL:
with default settings this would be: http://localhost:8080/YourProjectName
You should see the basic seam application running in your browser, something very similar to the Ruby on Rails functionality.
 At this point you are able to log in/out of the application which, maybe it’s not much but just wait a bit for the best piece of cake..
8. Go back to Seam folder and type: ./seam generate-entities
This will reverse-engineer EJB 3.0 entity beans from your database.
9. Type ./seam restart and your application will be hot-redeployed to the application server.
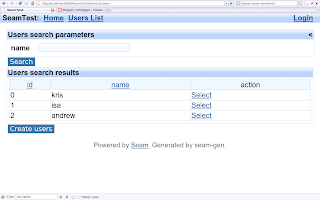
10. Refresh your application in the browser and you are ready to go.

The links at the top of the web page are links for managing in CRUD way your database. Click on one of them (depends how many tables you had in your database, for this tutorial I had created just one with two columns – yes I know, I’m lazy!) and you are able to mange your database data.
Problems:
I hope you won’t have any, but I did, so just to have a peace of mind I will write here what I did.
Very strange thing, well, when you don’t really know what you are doing you always feel strange ;), but to the point, when I have downloaded JBoss Seam for the first time on my system about 3 days ago, I was doing everything I could to make it work and it just didn’t really want to run. I was able to generate entities but not able to run the link responsible for managing the tables. Anyway, I have sorted it in two ways. First, I have removed JBoss AS, and JBoss Seam completely and started from scratch about 2 hours ago and everything works perfectly :), second, if it still doesn’t work in your case, do the following:
1. Make sure than the database password exists in the following files from yourProjectName/resources/:
SeamTest-dev-ds.xml
SeamTest-prod-ds.xml
2. You can experiment with persistence.xml file found in: yourProjectName/exploded-archives/SeamTest.jar/META-INF and change the
……………………..
<properties>
<property name=”hibernate.dialect” value=”org.hibernate.dialect.MySQLDialect” />
<property name=”hibernate.hbm2ddl.auto” value=”none” />
</properties>
……………………..
The value of hibernate.hbm2ddl.auto stands for:
none – schema is not automatically created when the application is deployed.
create-drop – tables are created at application deployment and dropped at redeployment.
update – the schema is updated or created but the content is not deleted.
By the way, the Yuan’s book is great, could be a bit bigger and more detailed but still a very good read. You can have a look at Yuan’s blog to find out more @:
http://www.michaelyuan.com/blog/seam-next-gen-web-framework/