iBirdFeeder – Part III – Amazon AWS serverless setup
After the AWS IoT had been chosen for the main message communication service the natural choice to expand it to something more useful with persistence and REST API was was easy. This is the part where I got most excited as it turns out you can build the whole REST enabled application without installing single piece of software.
AWS IoT Rules
Sending and receiving messages between Raspberry Pi and AWS IoT service is fun and all but we need to do something more to make it actually useful. First, we would like to save the messages we are interested in for later use in some sort of the database. Using the IoT rules you can do many different things with the messages and one of them is to send them over to DynamoDB or S3 service. To create a rule for DynamoDB you would need to have a DynamoDB database table for the messages already created (please have a look below – the DynamoDB step – for more details)
Creating rules is again quite easy, select your resource on the IoT panel and on the right side of the webpage, just at the bottom you will see a button ‘Create a rule’
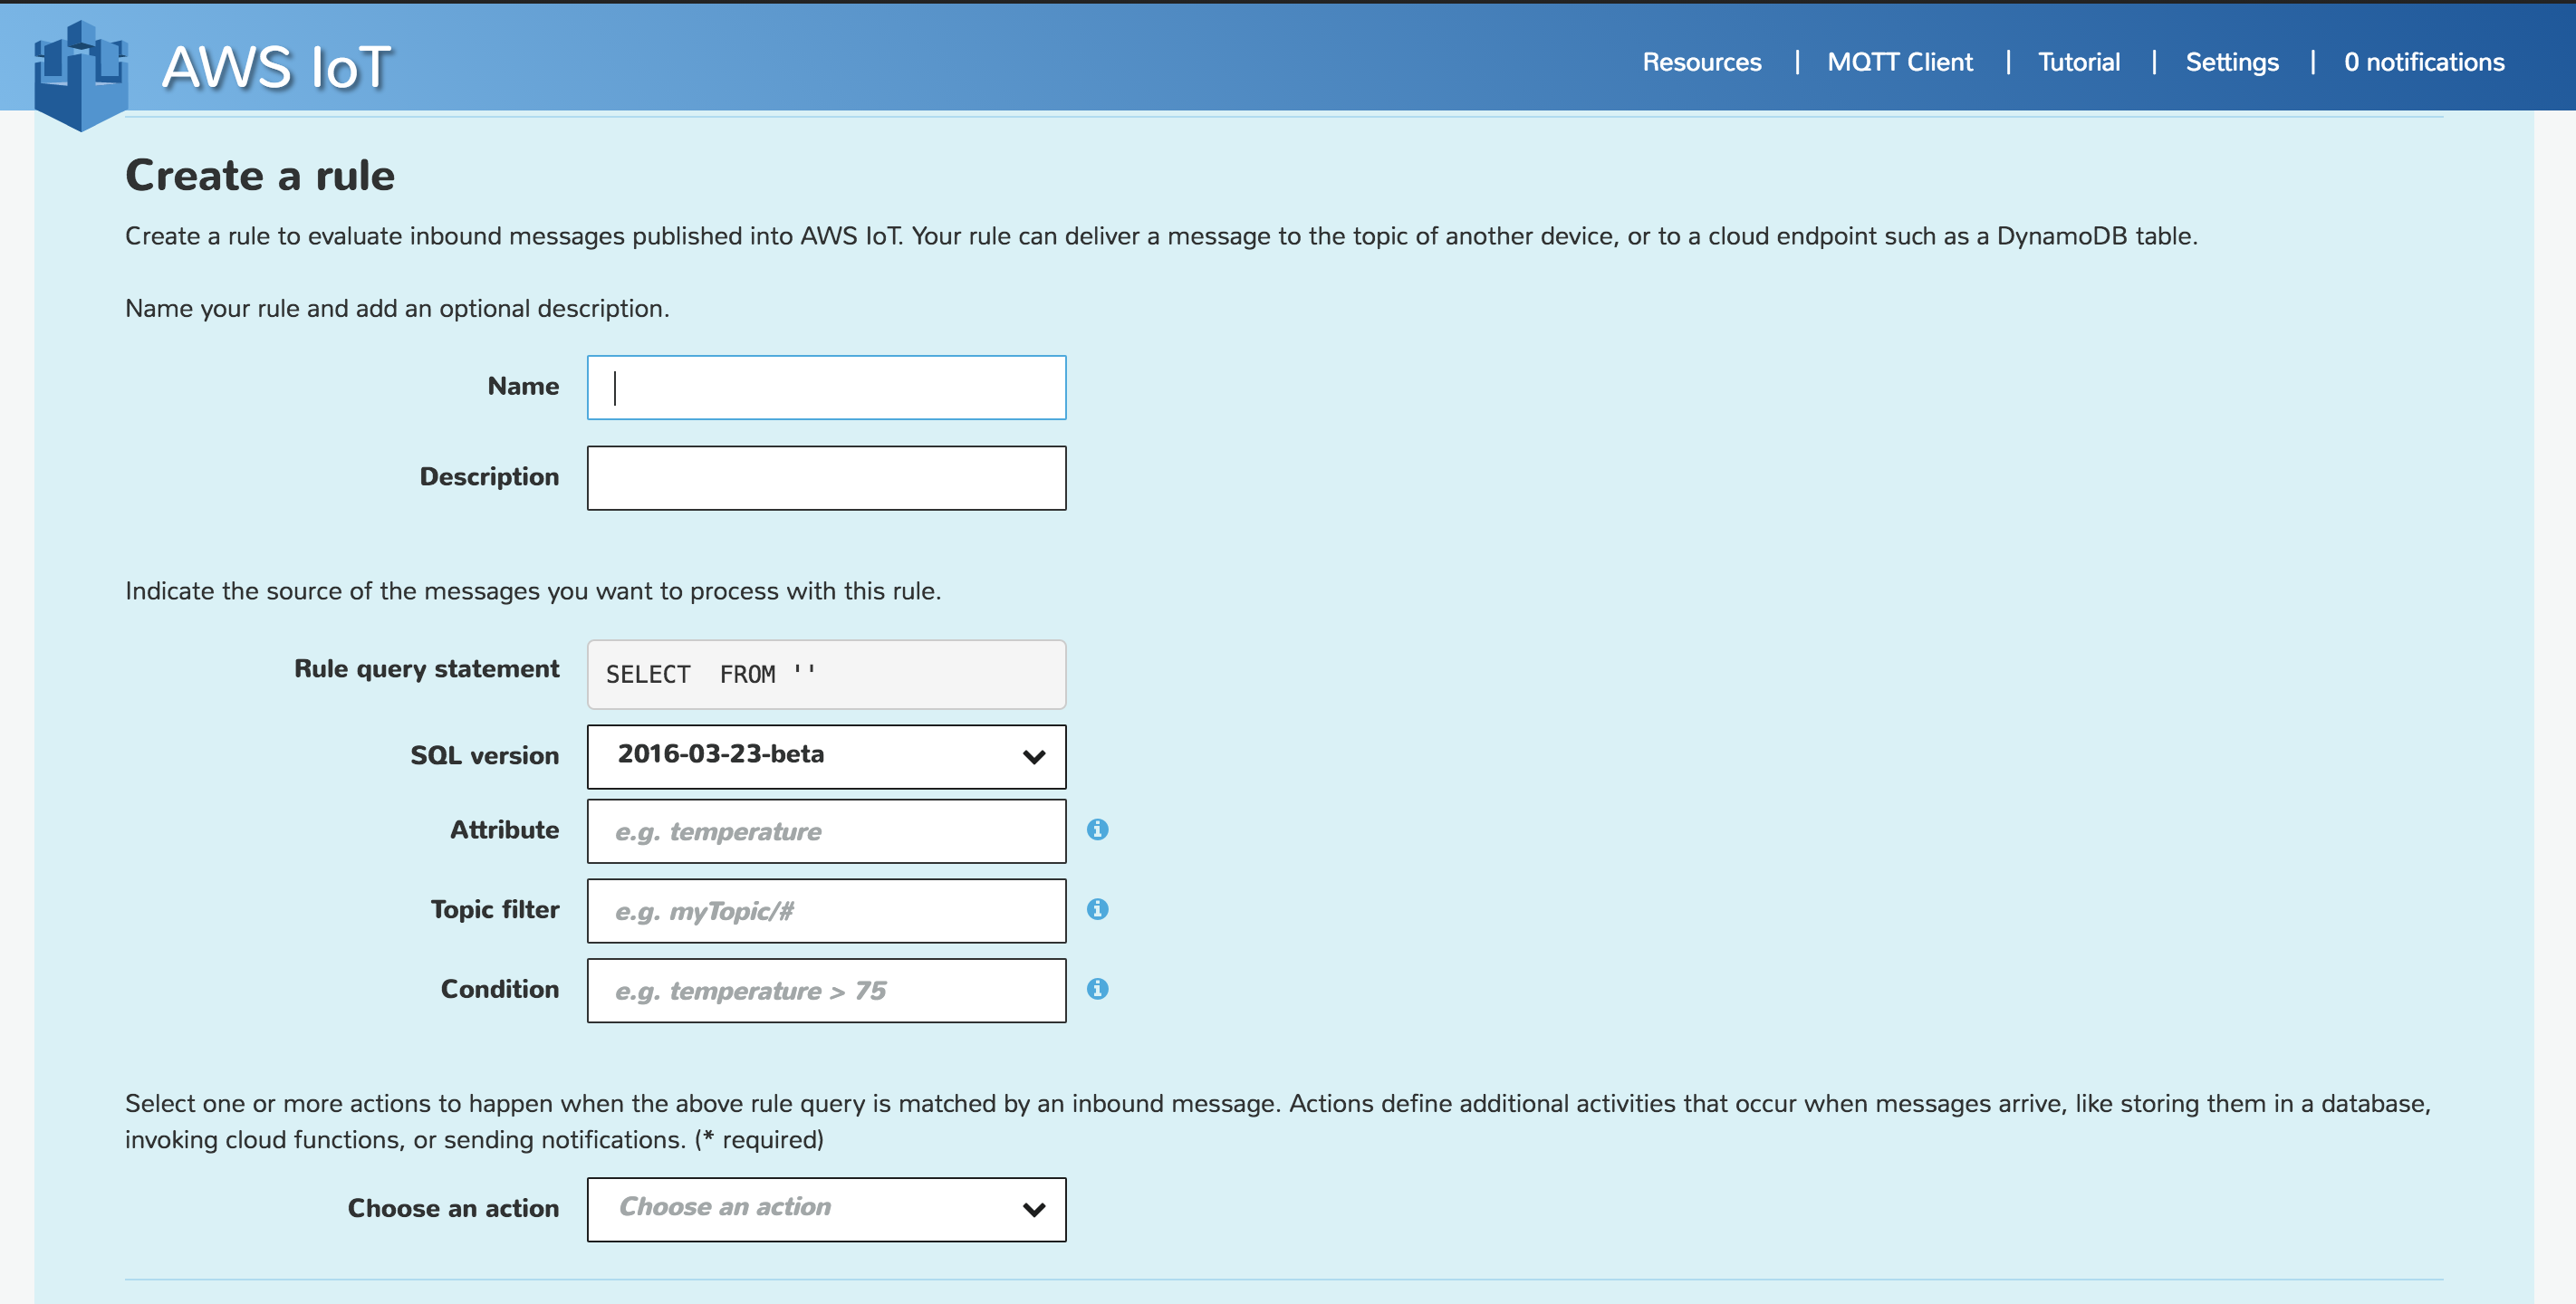
The name and description part is easy, just enter whatever you want there. In our setup (at least for now) we are using two topics we are sending messages into from the Raspberry Pi, first is called temperature and the second is called ‘image_created’. For both topics I have created a separate rule with 2 actions each. I will focus on the temperature topic here, the image_created topic setup is done the same way.
While still on the page shown above enter the topic filter ‘temperature’, your ‘Rule query statement’ should update automatically to smth like
leave it this way, for the action select the ‘Insert a message into database table (DynamoDB) and select the table available from the dropdown (see below on how to create one). The details for our temperature rule are as follows:
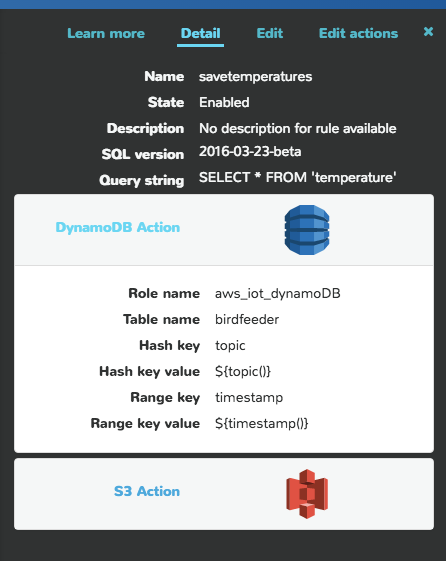
Important part is the Hash Key Value and Range Key, our hash key will be the name of the topic specified using the template ${topic()} while our range key will be a simple timestamp ${timestamp()}
I have added another action to save the last message from the topic to S3 service but its not necessary for this tutorial.
So, right now every message send from the RPi to AWS IoT using the temperature topic will be saved to DynamoDB table. Please note that you won’t be able to see those messages any more on the MQTT IoT web client and to see the content of the messages you should send them in JSON format.
DynamoDB
To use the rule described above you need a DynamoDB database table. Again no magic here except single thing which I couldn’t get myself for the first time. I turns out that you need to create a table which will have both the Range and Hash keys specified, otherwise you won’t be able to use that table as a sink for your messages while creating the Rule at IoT panel.

Once we have the data in the database we want to expose it to the world, for that we will use another set of AWS web services: Lambda with exposed API endpoints
Lambda
The lambda service is the one I haven’t used previously and I was really surprised to find out how cool it is.
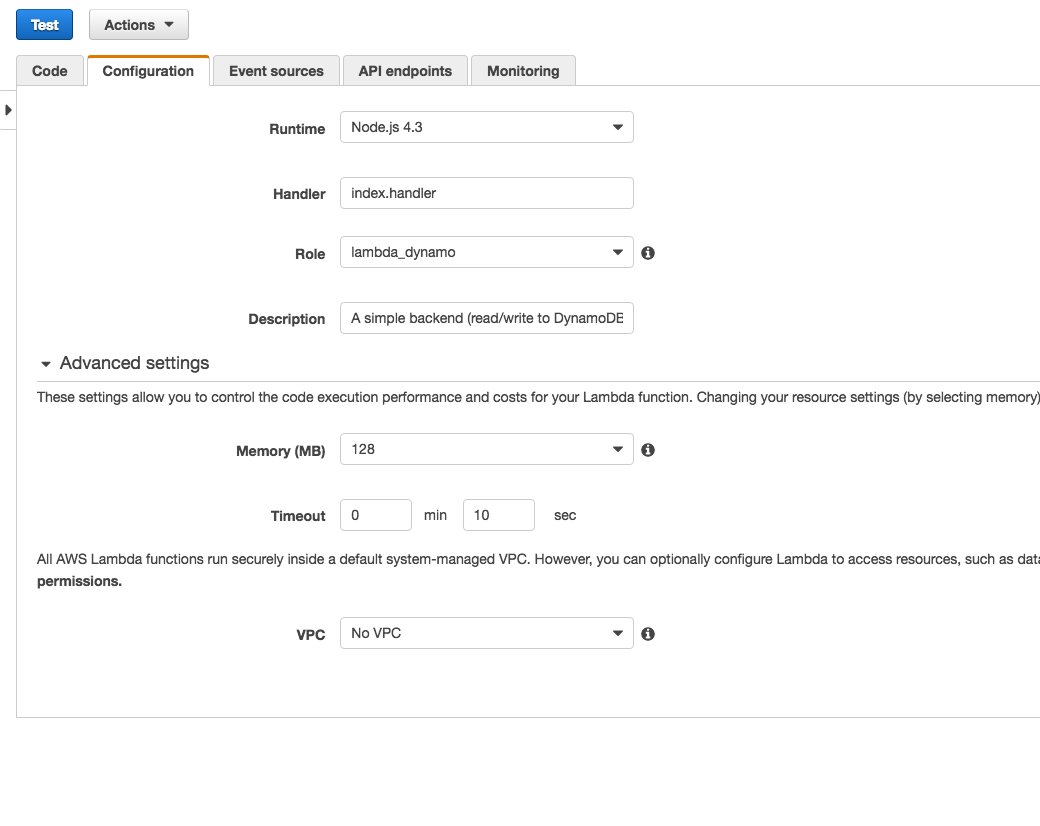
You can create a Lambda function using the wizard and many available already predefined templates to start with. Choose ‘microservice-http-endpoint’ with Dynamo DB as a template and you are ready to go

You can edit the function code inline, for the simple endpoint where you can retrieve your records easily you can use the following:
console.log('Loading function');
let doc = require('dynamodb-doc');
let dynamo = new doc.DynamoDB();
/**
* Provide an event that contains the following keys:
*
* - operation: one of the operations in the switch statement below
* - tableName: required for operations that interact with DynamoDB
* - payload: a parameter to pass to the operation being performed
*/
exports.handler = (event, context, callback) => {
//console.log('Received event:', JSON.stringify(event, null, 2));
const operation = event.operation;
if (event.tableName) {
event.payload.TableName = event.tableName;
}
switch (operation) {
case 'read':
dynamo.getItem(event.payload, callback);
break;
case 'list':
dynamo.scan(event.payload, callback);
break;
case 'echo':
callback(null, event.payload);
break;
case 'ping':
callback(null, 'pong');
break;
default:
callback(new Error(`Unrecognized operation "${operation}"`));
}
};
When you have the code section complete you can move onto creating the API endpoint where you can knock later to get your data. Just to make it simpler I have used a POST type endpoint to easily send the parameters as a body of the request. The wizard for creating endpoint is shown below.


REST API
Once the endpoint is created you can use it to retrieve your records using simple POST requests with DynamoDB query sent over as a message body.
The POST body example (find the records for images only):
"operation": "list",
"tableName": "birdfeeder",
"payload": {
"TableName": "birdfeeder",
"FilterExpression": "topic = :val",
"ExpressionAttributeValues": {
":val": "image_created"
},
"ReturnConsumedCapacity": "TOTAL"
}
}
Example response:
"Items": [
{
"topic": "image_created",
"payload": {
"resource_created": "image_20160503-081659.jpg"
},
"timestamp": "1462263430085"
},
{
"topic": "image_created",
"payload": {
"resource_created": "image_20160503-083229.jpg"
},
"timestamp": "1462264359390"
},
{
"topic": "image_created",
"payload": {
"resource_created": "image_20160503-083319.jpg"
},
"timestamp": "1462264408567"
}
],
"Count": 3,
"ScannedCount": 14,
"ConsumedCapacity": {
"TableName": "birdfeeder",
"CapacityUnits": 0.5
}
}
Known problems, further work and conclusions
After a couple of weeks, after installing the bird feeder on my roof I have found a couple of small problems which needs to be fixed somehow. First of all, after the stormy weather my camera module got covered with mist from inside of the lens somehow and the photos produced were extremely blurred. That problem fixed itself after a couple of days and now the photos are clear as usual. Second, the feeder pipe gets stuck occasionally and I haven’t really figured out yet why that happens, maybe because the seeds get bigger when they are moisturized, no idea.
At the moment we have a bird feeder which, once the bird is around, will send the photo to S3 web service, post outside temperature every 10 minutes to DynamoDB as well as information about created resources. I have now the REST API available so the next steps will be to develop a simple website where the latests photos can be viewed as browsing the S3 service through AWS Management console is quite cumbersome.
Watch the blog for updates and more work regarding the iBirdFeeder project.